Look at this narrow space we wallpaper installer s have to squeeze into! Less than 3′ wide. Note how I can’t even fully extend my ladder’s legs. Meaning that I’ll be off-balance while standing on sloped steps, and trying not to bop the left wall with the top of my ladder or the folding shelf, while the rear side of my body is trying to not scrape or lean into the wall on the right. Now try to envision this with the powder room door swinging inward into the room, taking up more space (they don’t have to do it this way, but most builders still do (Google it). And me having to move the ladder and jimmy around it every time I need to leave or re-enter the room (which is very frequently). Me, ladder , tools , toilet , vanity ,… and door ! All sandwiched into this 3′ x 8′ space! I mentioned this to the homeowner, and how inconvenient it is / makes me want to pull my hair out!
Next thing you know, Hubby came in with a nail-set and a hammer , and within 3 minutes (no kidding – I timed it!), he had slipped the pins out of the door hinges and pulled the door off and out of the room. Look at the very far left of this photo. Whew! Very grateful!
Originally, this powder room was painted a bold orange . The homeowner thought that was what she wanted, and so lived with it for a few years. But yearned for something more lively and fun. In this photo, I’ve skim-floated and sanded the walls smooth , primed , and am now ready to hang wallpaper .
Just – WOW! Wallpaper really perks the room up. This pattern injects both color and visual movement. And a big smile on your face!
Vanity / sink wall .
The wall to the right will be painted a dark pewter metallic . The homeowner has three heirloom mirrors in the cathedral style , that are tall and skinny, and fill out this wall perfectly .
Close-up
Rolling bolts out on my work table, to get dimensions , pattern repeat , pattern placement , check for any irregularities, and etc.
This wallpaper is called Brushstroke Floral and is by York , one of my preferred brands. It’s non-woven material and can be hung by the paste the wall method , or, as I usually prefer, paste the paper . There were some issues with this paper; please refer to future posts . The home is in west Houston . installer This wallpaper pattern is by York, and was bought from my favorite source for good quality, product knowledge, expert service, and discounted price – Dorota Hartwig at Sherwin-Williams in the Rice Village off Kirby. (713) 529-6515. She is great at helping you find just the perfect paper! Discuss your project and make an appointment before heading over to see her. Call first, as her hours fluctuate. My clients love working with her!
Funny story. I visit clients and do consultations on Sunday afternoons. Yesterday I went to visit a long-time and many-time client (going back to the ‘90’s!) in their new one-story home (easier living for retirement-age folk). I rang the doorbell, but no one answered. This was odd, because my Sunday appointments are usually waiting for me, and I had texted my arrival time a few minutes prior. I persisted, and eventually a man opened the door. This was not the guy I’ve worked with over 30 years. Nor was he the right age. Maybe he was a guest or a relative. I said, “I’m here for wallpaper .” He replied, “Wallpaper? We’ve been waiting for you,” and held the door open. I took a half a step in, and realized I was looking at a familiar space. The man said, “You hung this wallpaper in our art niche a few years ago.” I remembered … it was a lovely faux cork. I also did another room in the house, a powder room, as I remember. But, obviously, he wasn’t in need of wallpaper at this moment. I asked, “Is this Sween Street?” He said, “Yes.” I asked, “Is this 2501?” I showed him my typed-up job ticket, which read “2501.” He said, “Yes.” Well, this was puzzling. But obviously my client had given me the wrong address. Or something. I apologized and walked back to my van. Called my client. Turns out the correct address, which got confused because they had only lived there a short time, was 2401. I proceeded to drive a few doors down and found the right home and right client. Oddly, I have no idea why the guy at the wrong house said, “We’ve been waiting for you.” I guess he recognized me, or saw the signs on my van, and was just being nice, or making a joke. Who knows? I’m glad that, at least, he didn’t think I was a suspicious character. Or an axe murderer.
This is a very small powder room with low ceilings (tucked in under the stairs ). And it’s very difficult to move around in, especially with a ladder and some tools in there, and dropcloths tangling in your feet. So what a joy that the homeowners had removed the toilet and sink (they’ll be replaced with new fixtures). This makes it a whole lot easier to move around in here.
Also, note that this bathroom door opens outward. Most bath doors open inward, which makes going in and out and squeezing around equipment and door VERY tight and tedious. Having the door open out, or, sometimes the homeowner removes the door completely, makes it sooo much easier to work here. wallpaper installer houston
This is a short wall in the back of a powder room . The sloped ceiling is under the stairs . The dark stripe is on the wall under where the seams will fall, to help prevent white from showing at the seams . Do a search here to read more about that. We’re hanging wallpaper from right to left. The first strip of wallpaper was hung on the right. The second strip is to the left. As you can see, the second strip is narrower than the first one. That’s because you don’t wrap wallpaper around a corner. Because walls are never plumb and corners are never straight . As an example, just look at the top edge there, where the ceiling bows down more like a banana than a straight line . But that banana curve is a topic for another post. For now, we’re talking about the corner to the right. You don’t want to wrap wallpaper around corners, because, if the corner or drywall is not plumb , the left edge of the wallpaper will hang off-plumb , and your design will start tracking either up or down the wall. Also, if the wall / corner is not straight, the left edge of the wallpaper will not be straight, either. And that means that your next strip of wallpaper will not butt up perfectly with it. There will be gaps and overlaps . You can also end up with wrinkles and bubbles in the corner itself . So what you do is split that strip on the left . Measure the width from the previous strip into the corner, add 1/8″ (or 1/4″), and trim the strip vertically , taking off the portion that needs to go on the wall to the left. Install the wider strip, and it will wrap 1/8″ or 1/4″ around the corner. Look carefully at the second photo below and you can see that. The narrow strip that you cut off will be placed on the new wall, overlapping that 1/8″ or 1/4″ wrap. Note that, because you’re overlapping the strips, you will lose some of the pattern, so the squirrel and cherries won’t match up perfectly. I hate that, so I have my clients purchase a little extra paper, so, instead of using that trimmed-off strip, I can cut a new strip, and trim that new strip vertically so that the pattern matches as perfectly as possible.
Here is the wall with the sloped ceiling wallpaper in place. Now we’re ready to start hanging that wall to the left.
Here’s my freshly cut narrow strip, about to go in place. The blue plastic tape at the top is to keep paste from smearing onto the wallpaper on the ceiling.
A narrow strip like this is not very stable, and likely to not hang perfectly straight , so the left edge might not be perfectly straight. Also, pushing the strip into the crooked corner may make it conform to the undulations of the corner. And, again, that will render the left edge to not be straight.
Because I cut a new strip (instead of using the strip left over from trimming the piece vertically), the pattern matches perfectly.
But – whoops! As we move down the wall, short as it is, because the wall and corner are not plumb or straight, the pattern starts to not match. Note that the idea is to match the pattern as perfectly as possible at eye level, and let it go off in less noticeable places – like toward the ceiling or floor.
Trimming off the excess at the ceiling . Note that this brand of non-woven wallpaper material is much more fragile than most, and so you see that the trimming razor blade has snagged and torn some of the paper. A scissors will help clean up this jagged edge.
Note that the pattern on the plumb wall is not going to match up with that on the sloped ceiling. Also, remember that we matched the pattern as it went up the back wall. But as you turn a corner and start a new wall, the pattern won’t match at the ceiling. That’s to be expected. There are a few tricks to help disguise some of these mis-matches, which are discussed in other blog posts.
So here I am, hanging the next strip of paper, a full-width strip, against the narrow strip in the corner. My full-width strip is much more stable, so the right edge is pretty straight.
But as it butts up against the narrow strip to the right, you see some gaps …
… and some overlaps.
So I’m gently pulling that narrow strip away from the wall. If you’ve properly primed and prepped the wall, and used adequate paste , and kept that paste wet, and not waited too long … you should be able to do this easily, without damaging either the wallpaper or the surface underneath. Now you can manipulate the narrow strip (which is flexible because it’s both narrow and because the material itself is malleable), a bit to the the right or left to eliminate those gaps and overlaps.
In order to get this narrow strip to butt up against the full-width strip, the bottom portion is repositioned and moved toward the right. And you can see that it’s starting to wrap around the corner. Naah. Don’t want that. We want the paper to stop right in the corner.
So I’m going to use a straightedge , snap-off trimmer blade , and scissors to carefully trim off the overage.
And here you go. Note how pulling this strip to the right also corrected the slight pattern mis-match . Funny how crooked corners work!
The brand is called Home Style and is from the U.K. It’s a vinyl -coated paste the wall product and is more resistant to stains than traditional paper-papers. Non-woven wallpapers are also designed to strip off the wall easily and in one piece, with no damage to the wall, when you redecorate . The home is in the Garden Oaks area of Houston . installer
Before. This is a very small under-the-stairs powder room that was carved out of minimal space during an update and slight expansion of a 1940’s home in the Garden Oaks neighborhood of Houston , maybe 20 years ago. The homeowners have enjoyed the white daisy on dark wallpaper for a long time, but are ready for something fresh and fun . That curious window-thingie there was part of the garage wall in the original home floorplan .
Here it is finished. So nice that the sink and toilet are not in this tiny room, and that the door swings outward , instead of inward, as most bathroom s do.
I started with the back wall, which is the first thing you see when you open the door. I’m happy with the placement of the animals , as they all appear intact as you look across the wall. Meaning, that no one got his head or rear end cut off on this focal wall . I’ve striped darker paint on the wall where the seams will fall, to prevent white from showing at the seams. Do a search here to read other posts about this trick . Note the bow in the joint where the back wall meets up with the sloped segment of wall. This is pretty typical. Not a big deal with paint. But it means that the portion of wallpaper that goes up the sloped wall / ceiling will have a very slight pattern mis-match where it meets up with that bowed part of the horizontal joint .
Here is the wallpaper going up the sloped ceiling , which is the part under the stairs . Note that you don’t run one long strip of wallpaper up and across all these surfaces. For every corner, the wallpaper should wrap 1/8″ or so around the corner. Then you start with a new strip, matching the pattern as best you can (remember that bowed joint!), with about an inch of overlap, which then you trim off off the excess . This enables the paper to fit tightly into the corner / joint. Otherwise, you would end up with wrinkles and puckers and areas where the paper is not tight to the wall. Starting with a new strip of paper also allows you to make sure your new strip is hanging straight and plumb . Often you lose a bit of pattern match , but usually not much that anyone would notice.
At top of photo, continued up the ceiling and onto the flat portion of ceiling . Here is where the third section of wallpaper is cut and overlapped and trimmed into the joint. Note that the pattern on the vertical walls won’t match up with the pattern on the sloped wall .
The homeowners are from Scotland , and told me that these forest inhabitants are common and beloved over there. Her parents are regularly visited by red fox es, and feed them. Hedgehog , owl , deer , rabbit , squirrel , quail , all are denizens of the Scottish forests . Ditto the mushrooms , ferns , and other plant life .
Here’s that odd little window papered . I positioned the pattern so that it would continue from the wall into the niche as if the wooden molding were not there. The homeowner has a small rectangular mirror that will sit in the left side of the niche .
Close up.
The brand is Home Style and comes from the UK . It’s a flexible non-woven / paste the wall material , and was pretty nice. However, the substrate was hard to trim through, even with a brand new blade . It also wanted to drag a bit, leaving raggedy torn edges if you weren’t meticulously careful while trimming . And the material creased easily .
I hung this wallpaper a year or two ago, and was back to do the powder room, so got a chance to get a picture of the finished home office . I want to say that it’s the wallpaper that makes the room – but really, it’s the window treatment … and that yellow CHAIR !
I don’t remember the brand of the paper, and can’t find my original blog post, but it’s from the U.K. and is on a traditional pulp substrate material, which is a bit more tricky to work with than most modern paper types. birds installer houston
Here’s my work table, set up in the hallway outside the powder room where I’m hanging wallpaper . Padded moving blanket underneath to protect the floor. Thick purple towel extends beyond where U-Haul left off. Three collapsible trestles to support the table. The table is made of three boards, 11″ x 7′ , which fit together and are held in place by metal pegs. I use the 5/8″ thick boards. But the guys who are beefier than me often opt for the 3/4″ thick, which are a bit sturdier and less prone to bending / warping. And a lot heavier! Mine probably weigh about 30lbs. I wrap them in a thick blanket and secure with Velcro straps. Relatively easy to carry. I fold up the trestles and also wrap them in a sheet, secured with Velcro. Easy to carry, and also keeps those cushioned rubber feet from leaving marks on the wall, if I should accidentally brush against it whilst carrying all this bulky stuff into my clients’ homes. My 76″ straightedge is the blue bar hanging just under the front of the table. Many installers leave their paste roller in the bucket of paste, but I find that too messy. So I have mine hanging on the edge of the table. You also see my red trim guide, which I use to tear wallpaper against to get if off the roll . And a yardstick , scissors , damp microfiber rag , and blue cut tape (do a Search here to learn what this is used for, but basically to keep paste off surfaces, like ceilings ). Bucket of paste is below the table, with a roll of that blue cut tape sitting on top. Plus the blanket I wrap the boards up in, folded and sitting right where I’ll be standing, to give a little cushion to my feet throughout the day.
A lot of installers leave their boards as they come from the factory. Others apply a sealer . I don’t like paste getting into the grain of the wood, or trying to wipe paste off the porous surface. So I’ve covered my boards with clear Contact Paper. A lot of installers trim wallpaper directly on their boards / table , claiming that the wood is ” self-healing ” and that tracks from the razor blade disappear . I say that’s bunk! I took their word for it and tried it. I hadn’t had my boards more than a week when I realized that tracks gouges from the razor blades were developing in the wood, and were catching the blades and causing my trims to go squiggly or crooked . Not good! So now I trim on a strip of Lexon plastic , which you can kinda see running the length of the first board on the right. Better shot below.
To the right of the scissors is the plastic strip. It’s also used for double-cutting / splicing wallpaper on the wall . Lasts for a good number of cuts, inexpensive, and disposable. You can buy this, and the blue tape film at the Wallpaper Tool Store . https://www.wallpapertoolstore.com/ The table is 7′ long. I’ve attached thin flexible tape measurers from a fabric / hobby store to the edges . Pink on this side, and yellow on the far side. I measured in 6″ from the both ends of the boards, drawn a line across, and then placed the tape measures in the center 6′ length . At 12,” 24,” and 36,” etc., I drew dotted lines across the table, to help with measuring and rolling out wallpaper . The tape measures are under the clear Contact Paper, both to keep them clean and to prevent their thickness from catching the edges of the wallpaper that I will be working with on the table.
Before shot. The empty nesters lost their Braes Heights ( Houston ) area home during the unprecedented flooding brought by Hurricane Harvey in 2017. Over a year, they built a new home on the same site. Once completed, decorating was put on the back burner, and they moved in and set about trying to get back to “life as usual.”
But the homeowner always wanted wallpaper in at least the powder room, and so had the builder leave the walls untextured . Today, her dream was achieved!
Coordinates beautifully with the marble vanity countertop , as well as the brushed silver faucet and handles .
The wallpaper pattern has a modern feel and really brightens and freshens up the powder room .
It features a silver metallic finish on a textured / embossed vinyl surface .
More on how the arched window top was treated in a separate post.
The wallpaper is by Thibaut , one of my favorite brands . It’s on a non-woven substrate , and can be hung by pasting the paper (which I prefer, especially in chopped up rooms like this) or by the paste the wall method. With 20% polyester content, it’s more resistant to water splashes and stains than traditional papers . And it’s designed to strip off the wall easily and without damage to the wall when you redecorate . This wallpaper was purchased below retail through Dorota at the Sherwin-Williams in the Rice Village ( Houston ). She has 25+ years selling wallpaper and 300+ selection books – and she knows what’s in every one of them! So she can easily and quickly help you find your perfect pattern. Hours fluctuate, so call to make an appointment, and let her know what you’re searching for. (713) 529-6515
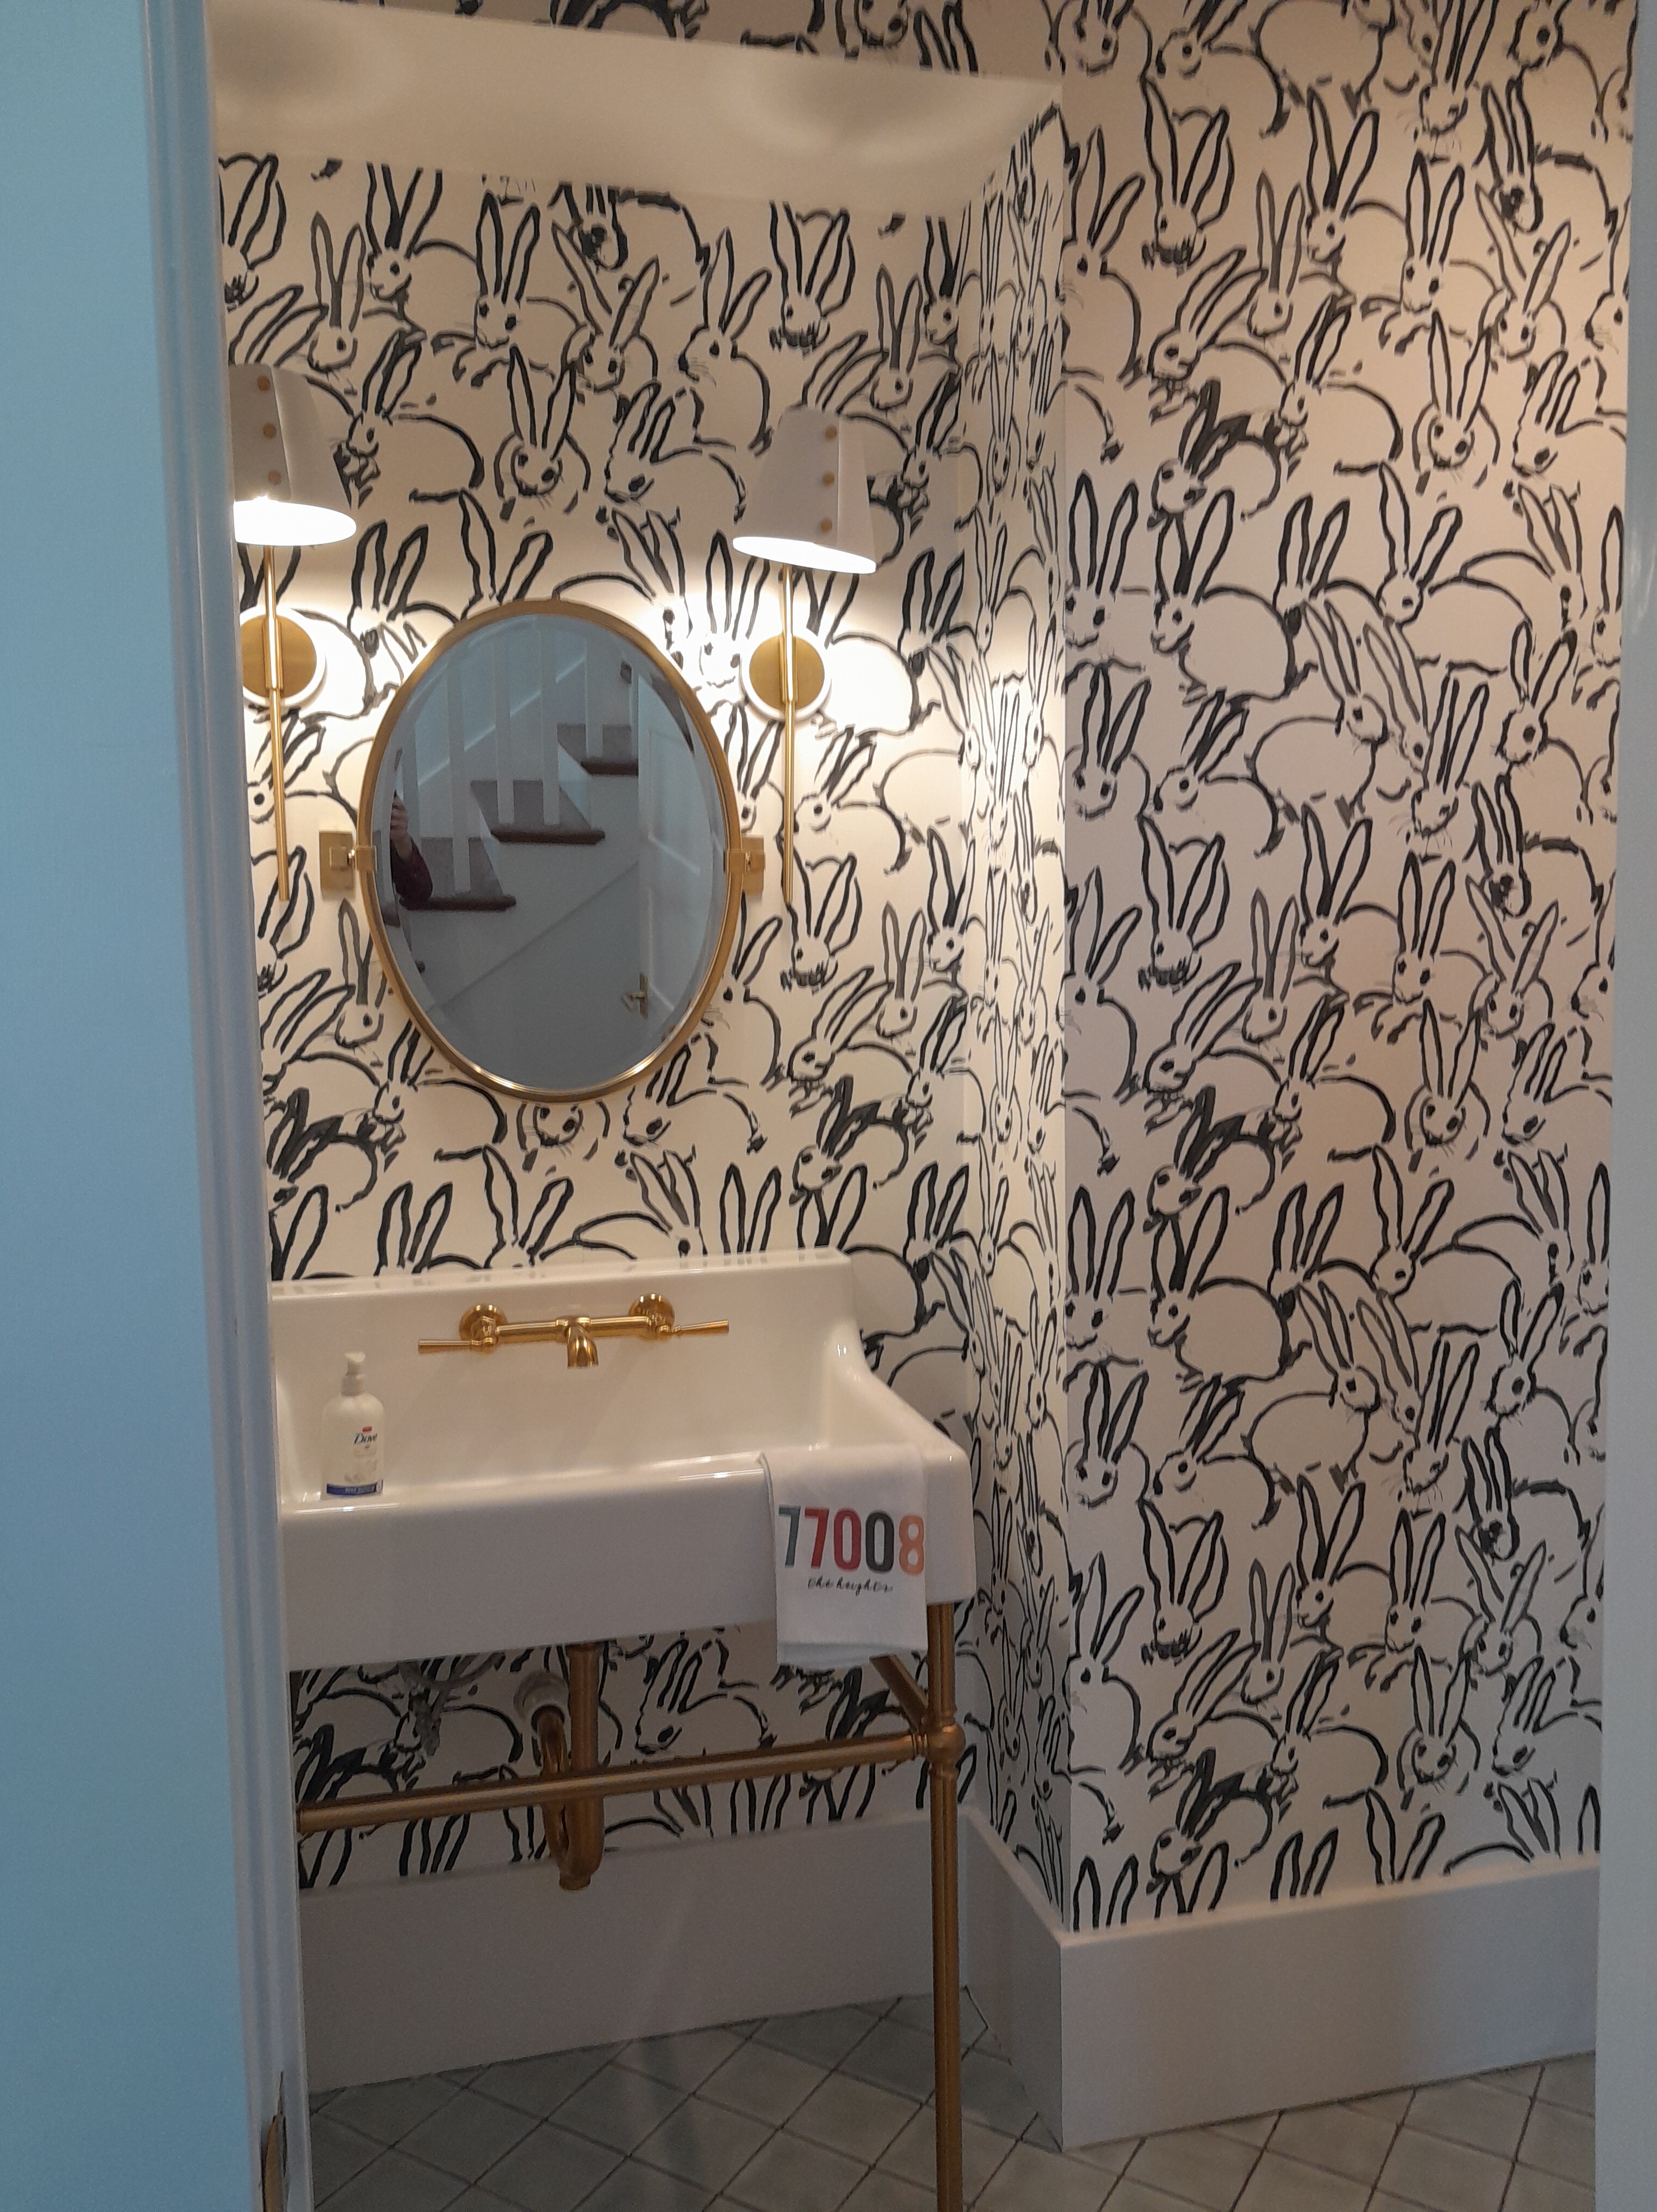
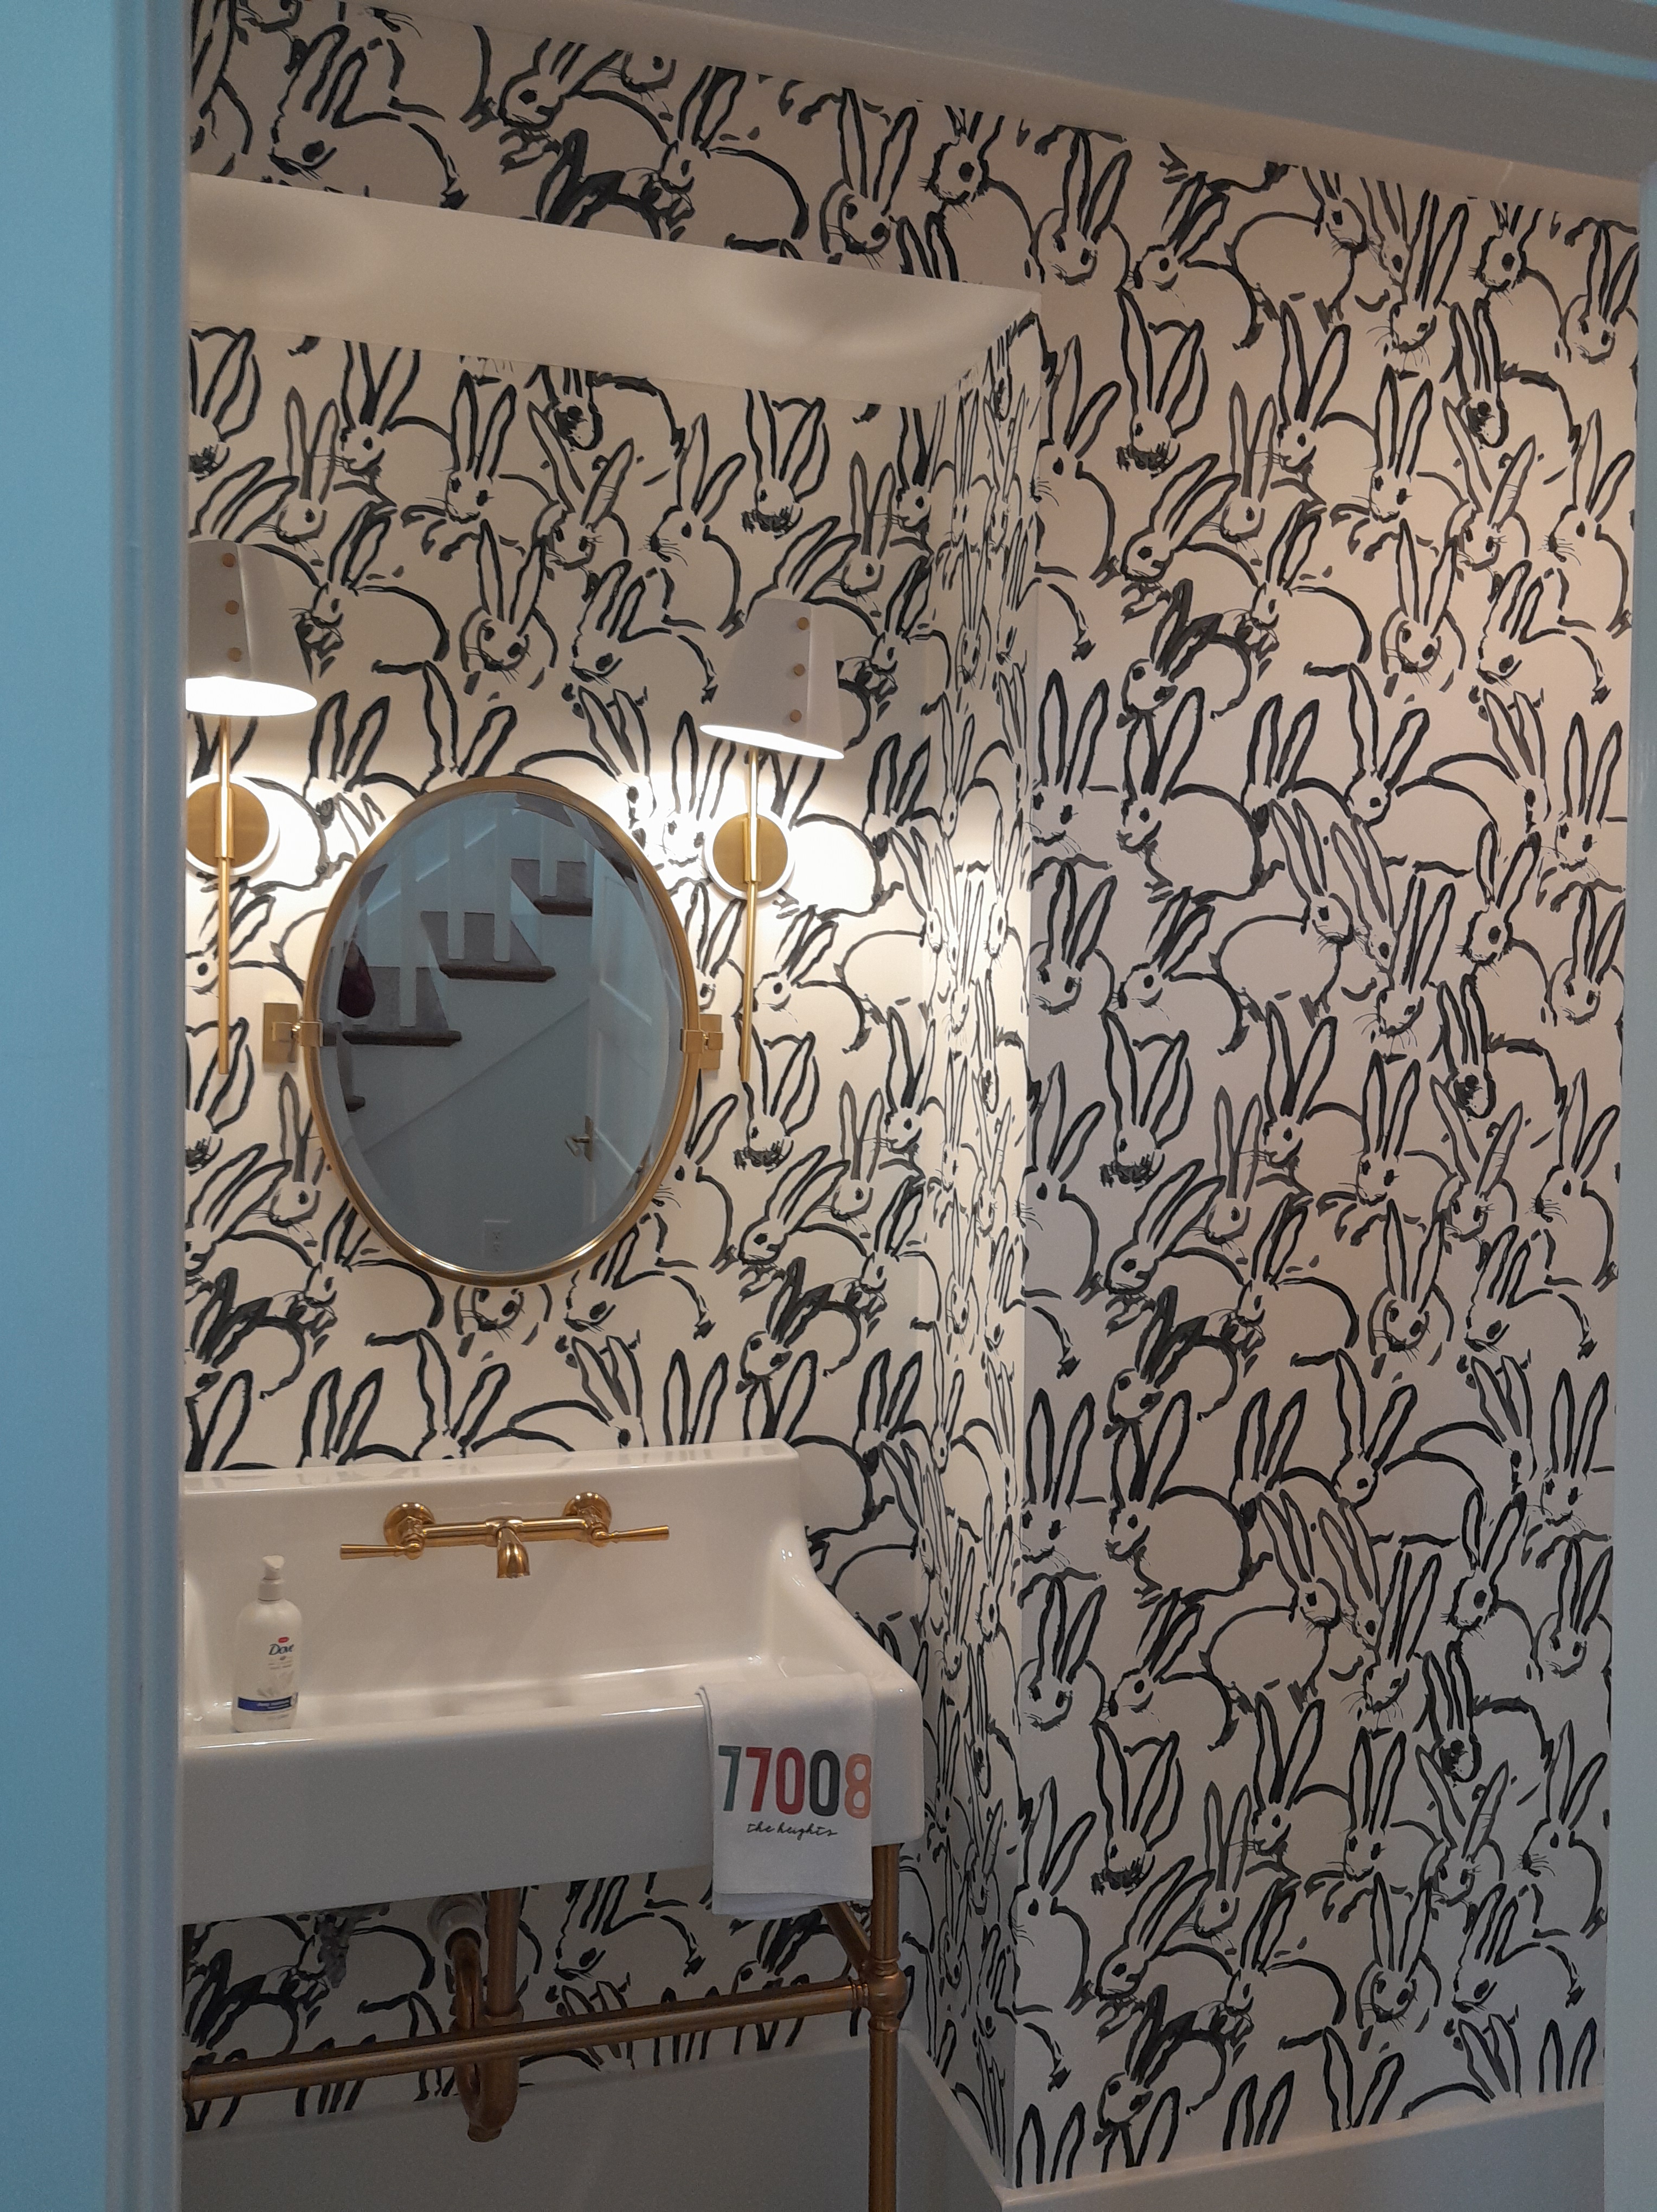
I saw this wallpaper in a powder room while taking the Houston Heights Home Tour last Sunday . This pattern was wildly popular about 10 years ago. Imagine squeezing under that console sink with metal legs to place the wallpaper under there.
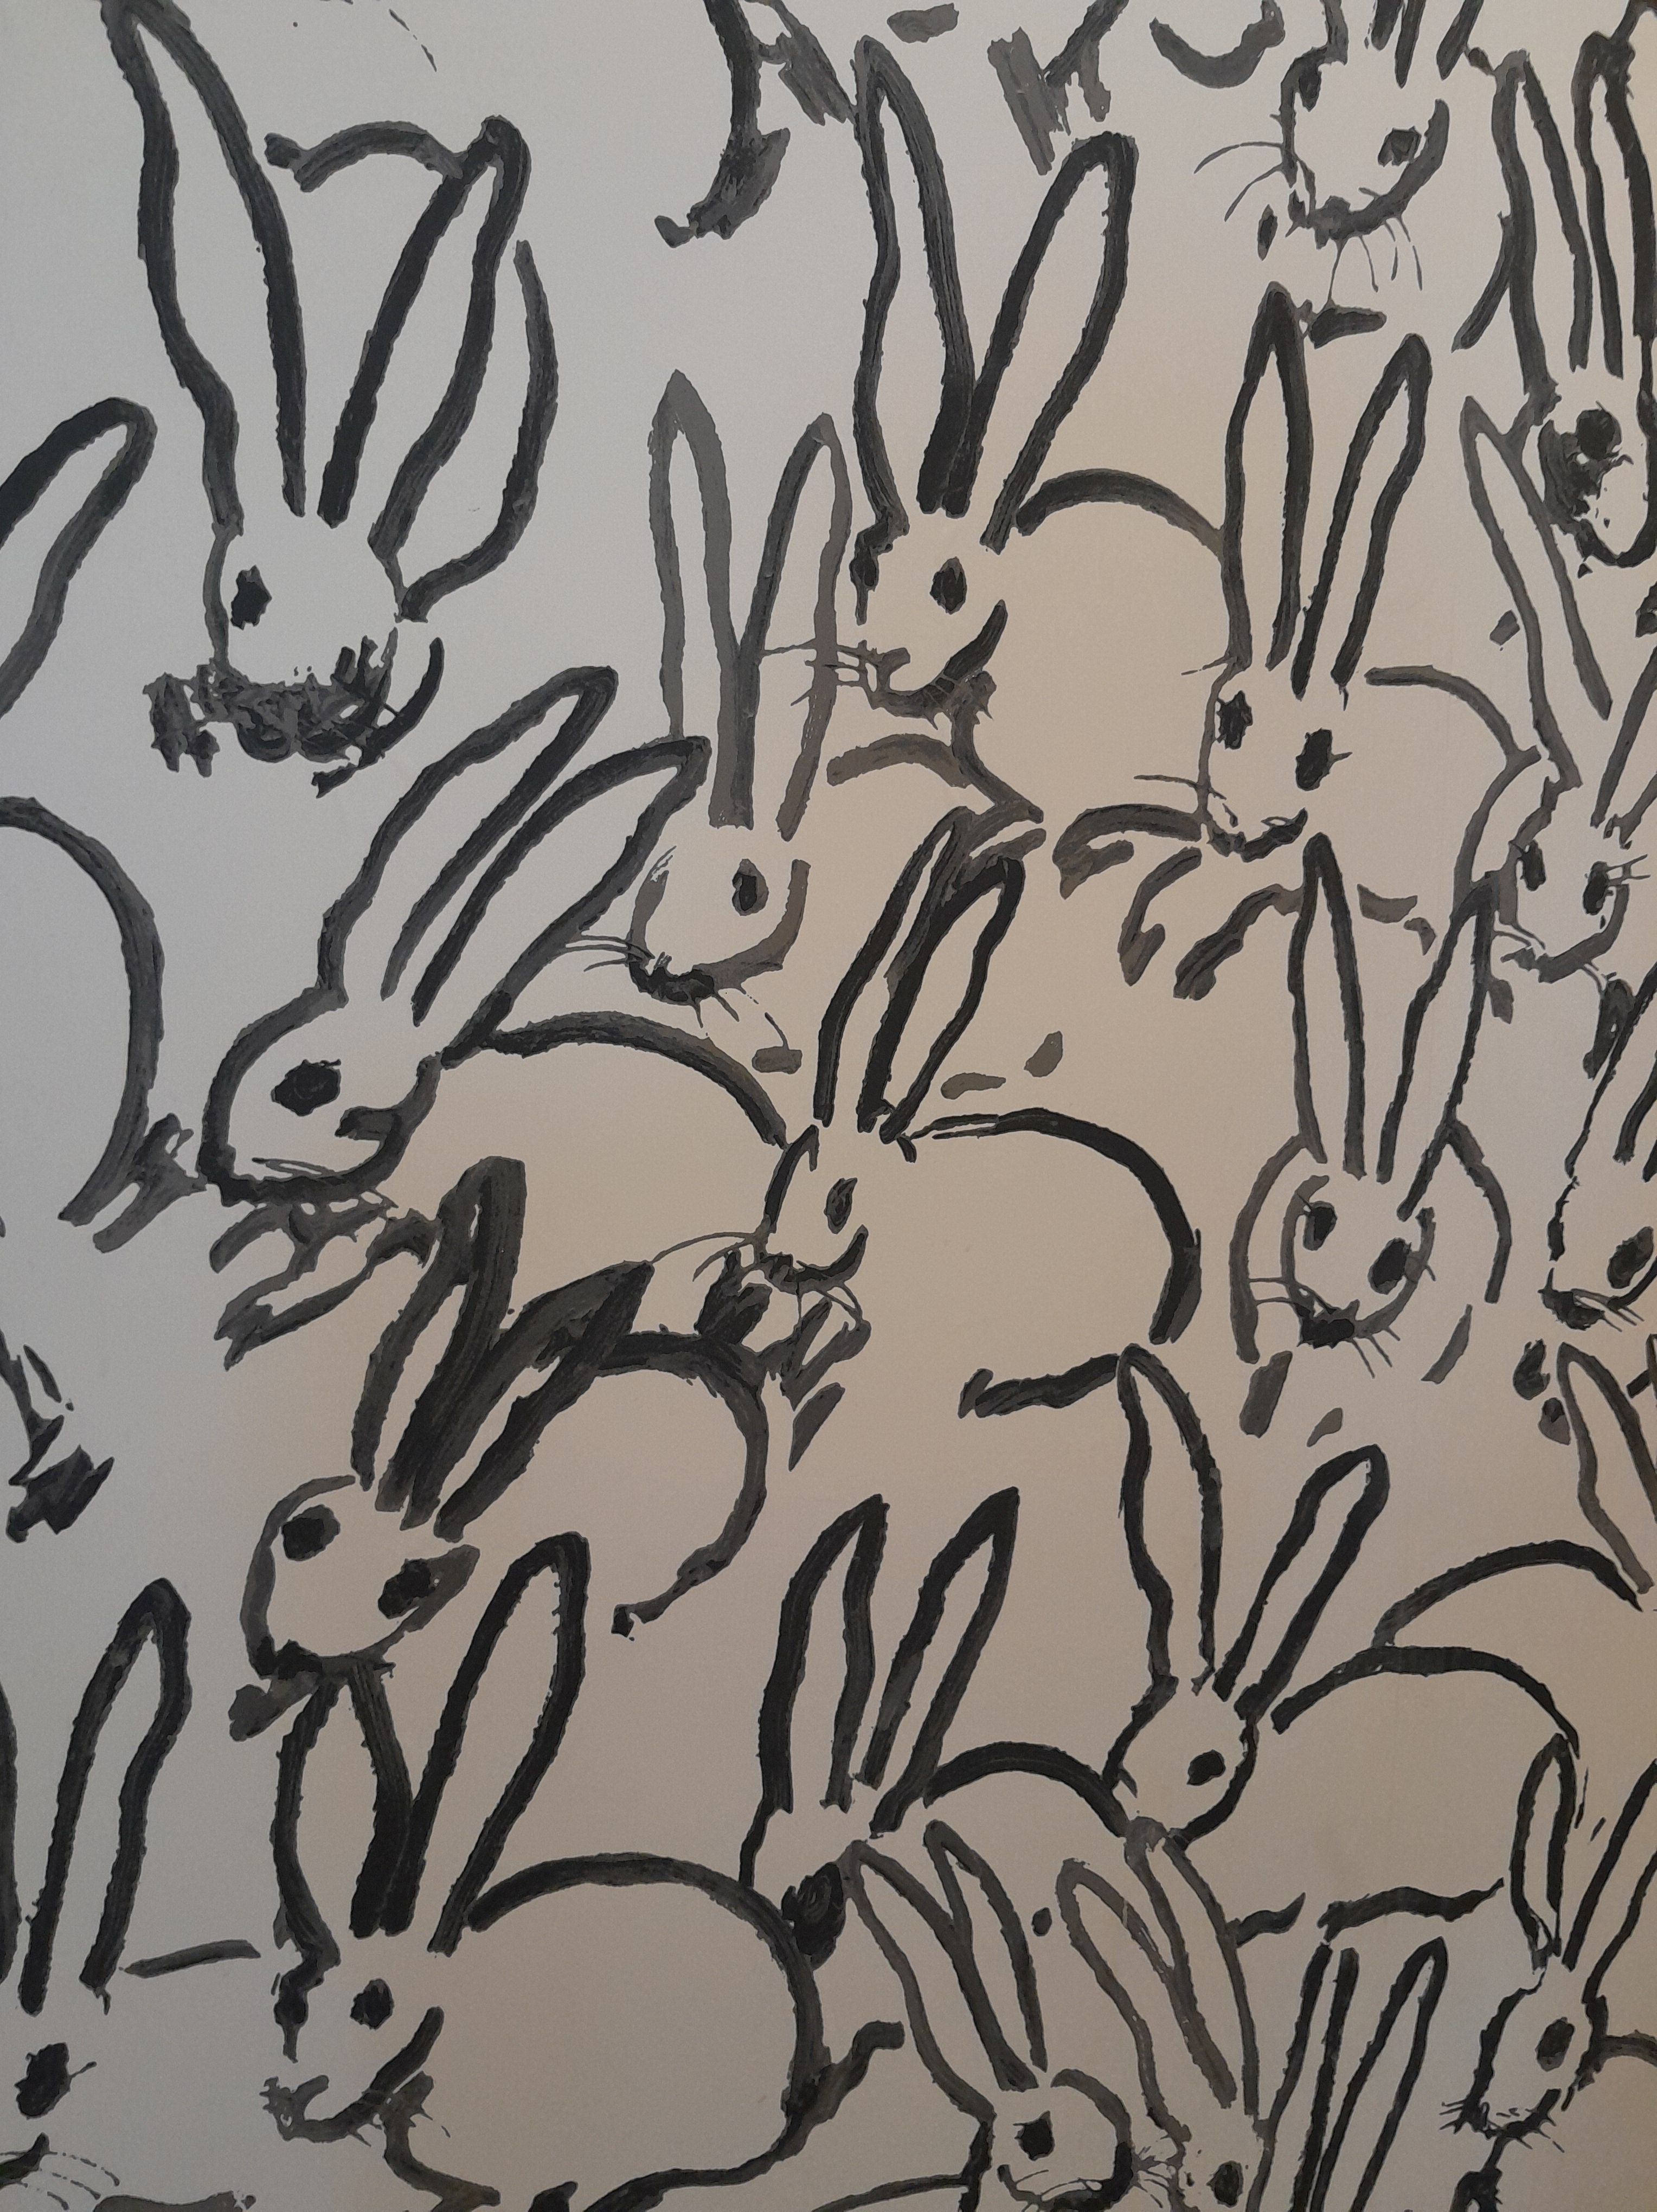
Another shot, showing a little more of the fir down / soffit over the sink . According to Wikipedia , the designer, Hunt Slonem , started developing his obsession with all things bunny in the early 1980’s . He’s produced lots of different incarnations, and they’ve been used in wallpaper , fabric , artwork , kitchenware , decorative items , and everything in between.
Such a fun pattern. “And they breed like – rabbits!” This wallpaper is notoriously difficult to install . More on that in a future post.